Lately I’ve been going through the MS Learn modules for the AZ-305: Designing Microsoft Azure Infrastructure Solutions exam in preparation for the actual exam which I’ll be taking in a month or so, once I receive my free exam voucher from MS Build this year, and I came across actual exercises in the modules. Thinking these will likely help me understand the concepts of especially the stuff I’m struggling with I decided to not just go through them, but also make a little write-up for them.
Local Preparation
In addition to Azure, we will be needing a local installation of Visual Studio Code and at least .NET 6 installed. .NET 7 works just as well, so if you’re already running a later version there’s no need to start juggling older version.
Creating Azure resources
For this exercise we’re basically going to be using the Cloud Shell, more specifically the Bash version of it, and once we’re in Cloud Shell we need to set up some variables, mainly the location (for the RG) and Service Bus messaging namespace. Let’s just use northeurope for the location and leave the rest as-is for the sake of clarity.
1
2
myLocation=<myLocation>
myNameSpaceName=az204svcbus$RANDOM
Next step is creating the Resource Group we’ll be working with. As usual, it’s pretty much the best practice to use separate RG’s for separate projects, and it’ll also make cleaning things up afterwards a whole lot easier.
1
az group create --name az204-svcbus-rg --location $myLocation
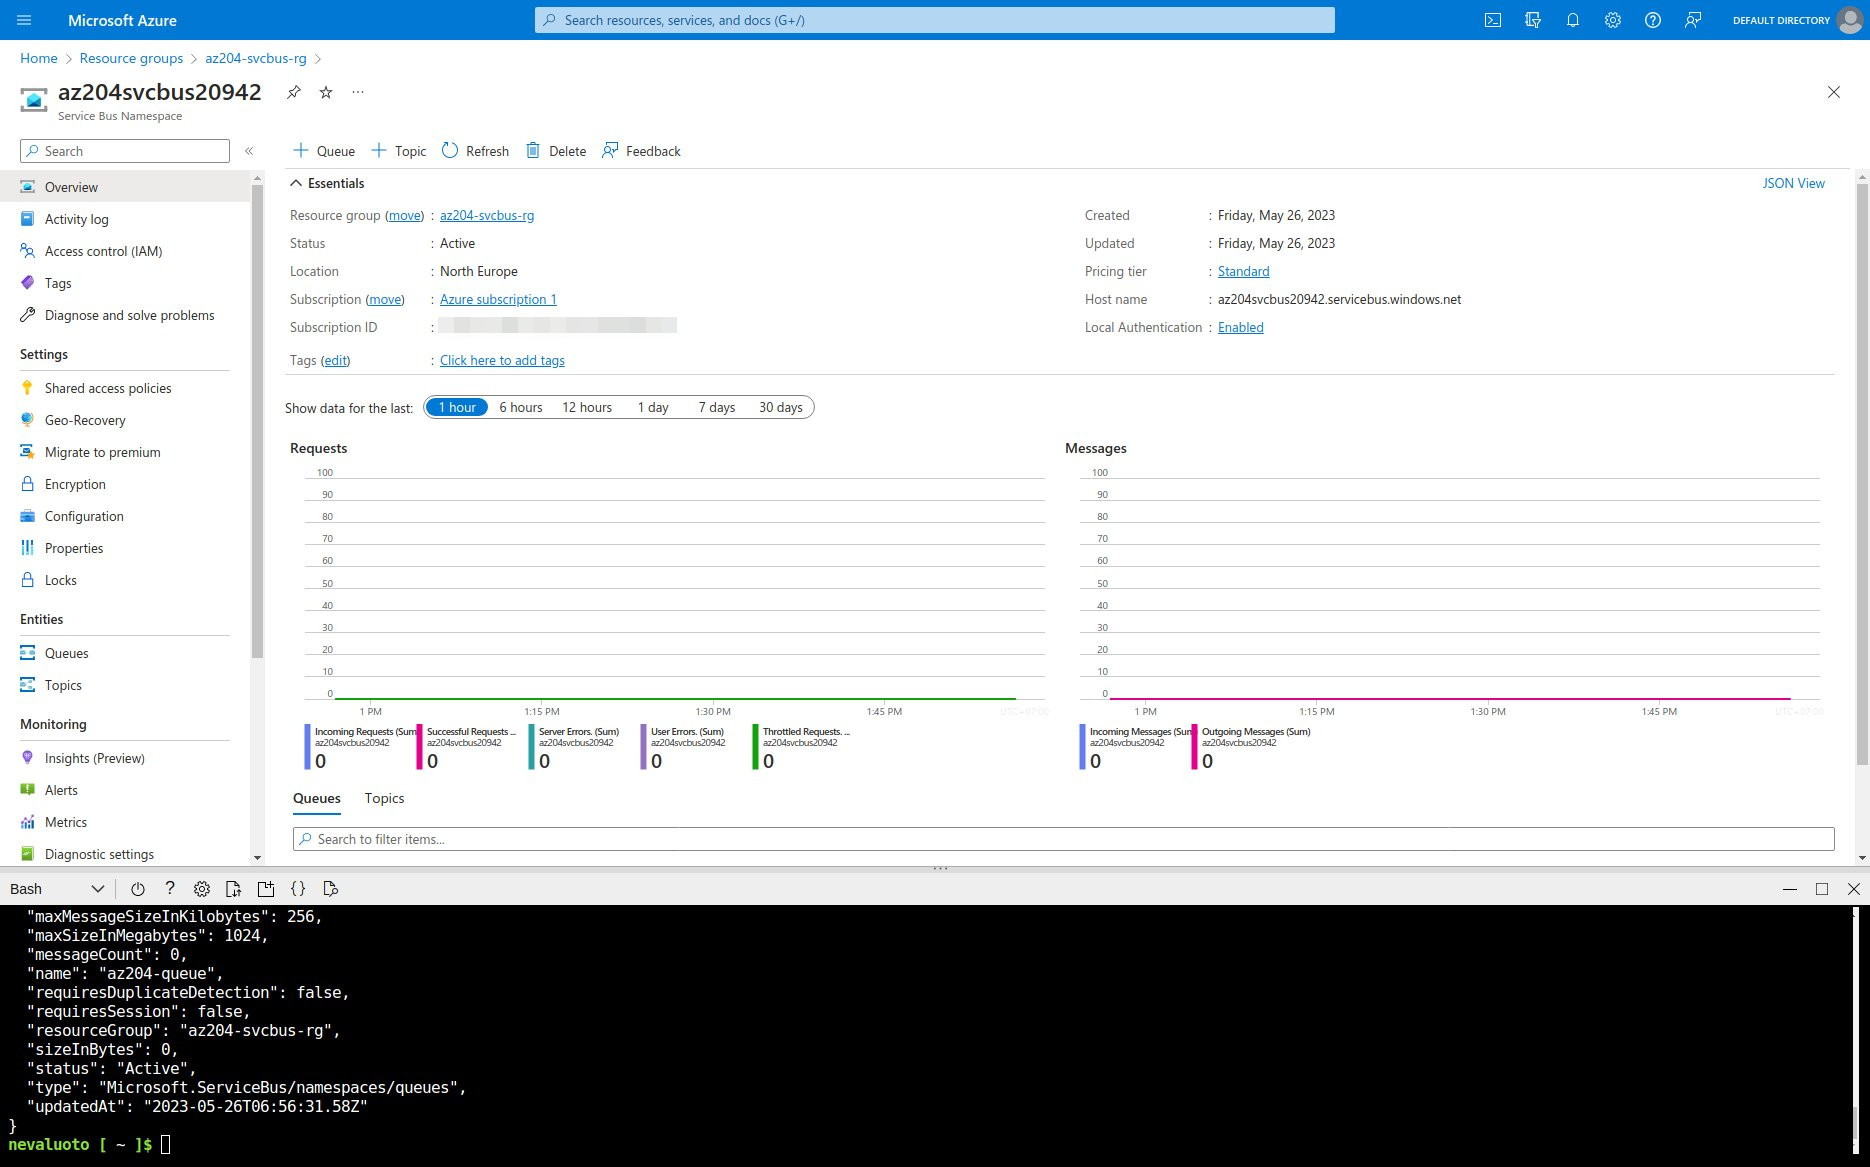
As long as the output reads “provisioningState”: “Succeeded” you know all is well. It can take a little while for the actual RG to show up in the Portal, but once az204-svcbus-rg shows up we can continue.
Next we’ll be creating a Service Bus messaging namespace using the variables set before and out new Resource Group.
1
2
3
4
az servicebus namespace create \
    --resource-group az204-svcbus-rg \
    --name $myNameSpaceName \
    --location $myLocation
If the resource provider Microsoft.ServiceBus is not yet registered on your tenant it will be enabled automatically, and it will take a while. Once that’s all done, we can create a Service Bus queue with the following command:
1
2
3
az servicebus queue create --resource-group az204-svcbus-rg \
    --namespace-name $myNameSpaceName \
    --name az204-queue
Retrieving the connection string for the Service Bus Namespace
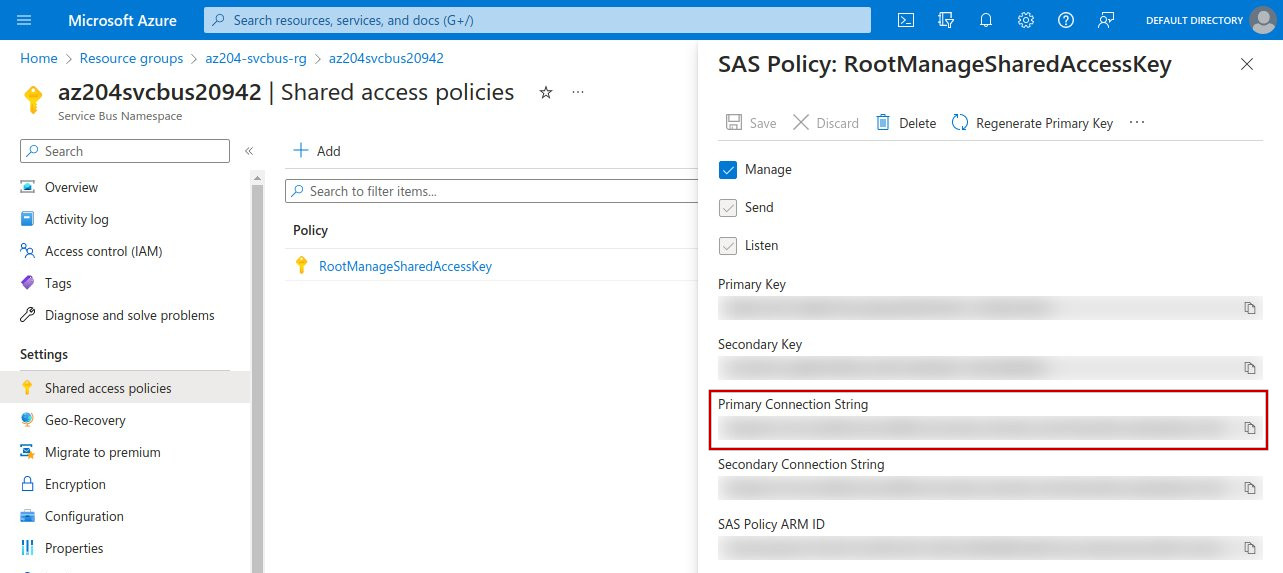
Next we need to get a shared access key from the namespace, and that can be achieved by doing the following:
- Open the Azure portal and navigate to the az204-svcbus-rg resource group
- Select the created az204svcbus resource
- Select Shared access policies in the Settings section, then select the RootManageSharedAccessKey policy
- Copy the Primary Connection String from the dialog box
Creating app to send messages to the queue
Now we’re getting to the actual meat and potatoes of the exercise. Let’s open up VSCode and then run the following commands to create the console app and add the Azure.Messaging.ServiceBus package:
1
2
dotnet new console
dotnet add package Azure.Messaging.ServiceBus
These will set up the .NET project and create a file called Program.cs which includes a simple Hello World in it, but we can just remove that and add the following code for our program:
1
2
3
4
5
6
7
8
9
10
11
12
13
14
15
16
17
18
19
20
21
22
23
24
25
26
27
28
29
30
31
32
33
34
35
36
37
38
39
40
41
42
43
44
45
46
47
48
using Azure.Messaging.ServiceBus;

// connection string to your Service Bus namespace
string connectionString = "<CONNECTION STRING>";

// name of your Service Bus topic
string queueName = "az204-queue";

// the client that owns the connection and can be used to create senders and receivers
ServiceBusClient client;

// the sender used to publish messages to the queue
ServiceBusSender sender;

// Create the clients that we'll use for sending and processing messages.
client = new ServiceBusClient(connectionString);
sender = client.CreateSender(queueName);

// create a batch
using ServiceBusMessageBatch messageBatch = await sender.CreateMessageBatchAsync();

for (int i = 1; i <= 3; i++)
{
    // try adding a message to the batch
    if (!messageBatch.TryAddMessage(new ServiceBusMessage($"Message {i}")))
    {
        // if an exception occurs
        throw new Exception($"Exception {i} has occurred.");
    }
}

try
{
    // Use the producer client to send the batch of messages to the Service Bus queue
    await sender.SendMessagesAsync(messageBatch);
    Console.WriteLine($"A batch of three messages has been published to the queue.");
}
finally
{
    // Calling DisposeAsync on client types is required to ensure that network
    // resources and other unmanaged objects are properly cleaned up.
    await sender.DisposeAsync();
    await client.DisposeAsync();
}

Console.WriteLine("Follow the directions in the exercise to review the results in the Azure portal.");
Console.WriteLine("Press any key to continue");
Console.ReadKey();
The main things to take a note of here are the connectionString and queueName. The latter is already set up correctly since we’re dealing with a tutorial template, but the connectionString needs to be replaced with the Primary Conenction String we got from Azure. Once those are set we can run the dotnet build command and if everything is correct, we’ll get a Build succeeded message without any errors or warnings. If that is the case, then all that remains to be done is actually to run the program to feed our messages to Azure with the dotnet run command. Once again if all is right, we’ll get the following message printed to Terminal:
1
2
3
A batch of three messages has been published to the queue.
Follow the directions in the exercise to review the results in the Azure portal.
Press any key to continue
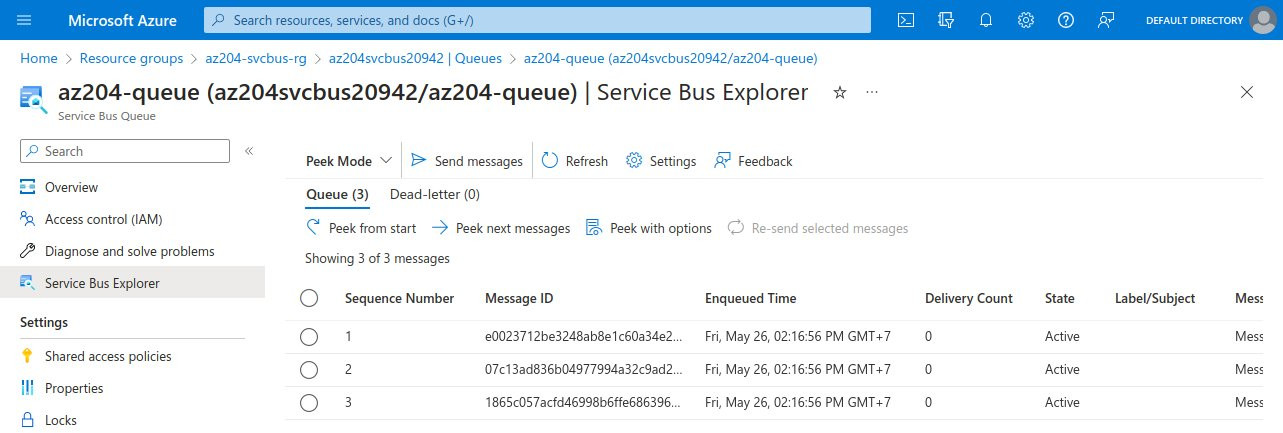
Reviewing the results
Let’s head back to the Azure Portal to see the messages and navigate to the Service Bus namespace. From the main view select Entities, Queues, az204-queue and finally Service Bus Explorer. We need to click on Peek from start to see the messages sent to the queue, there should be three of them.
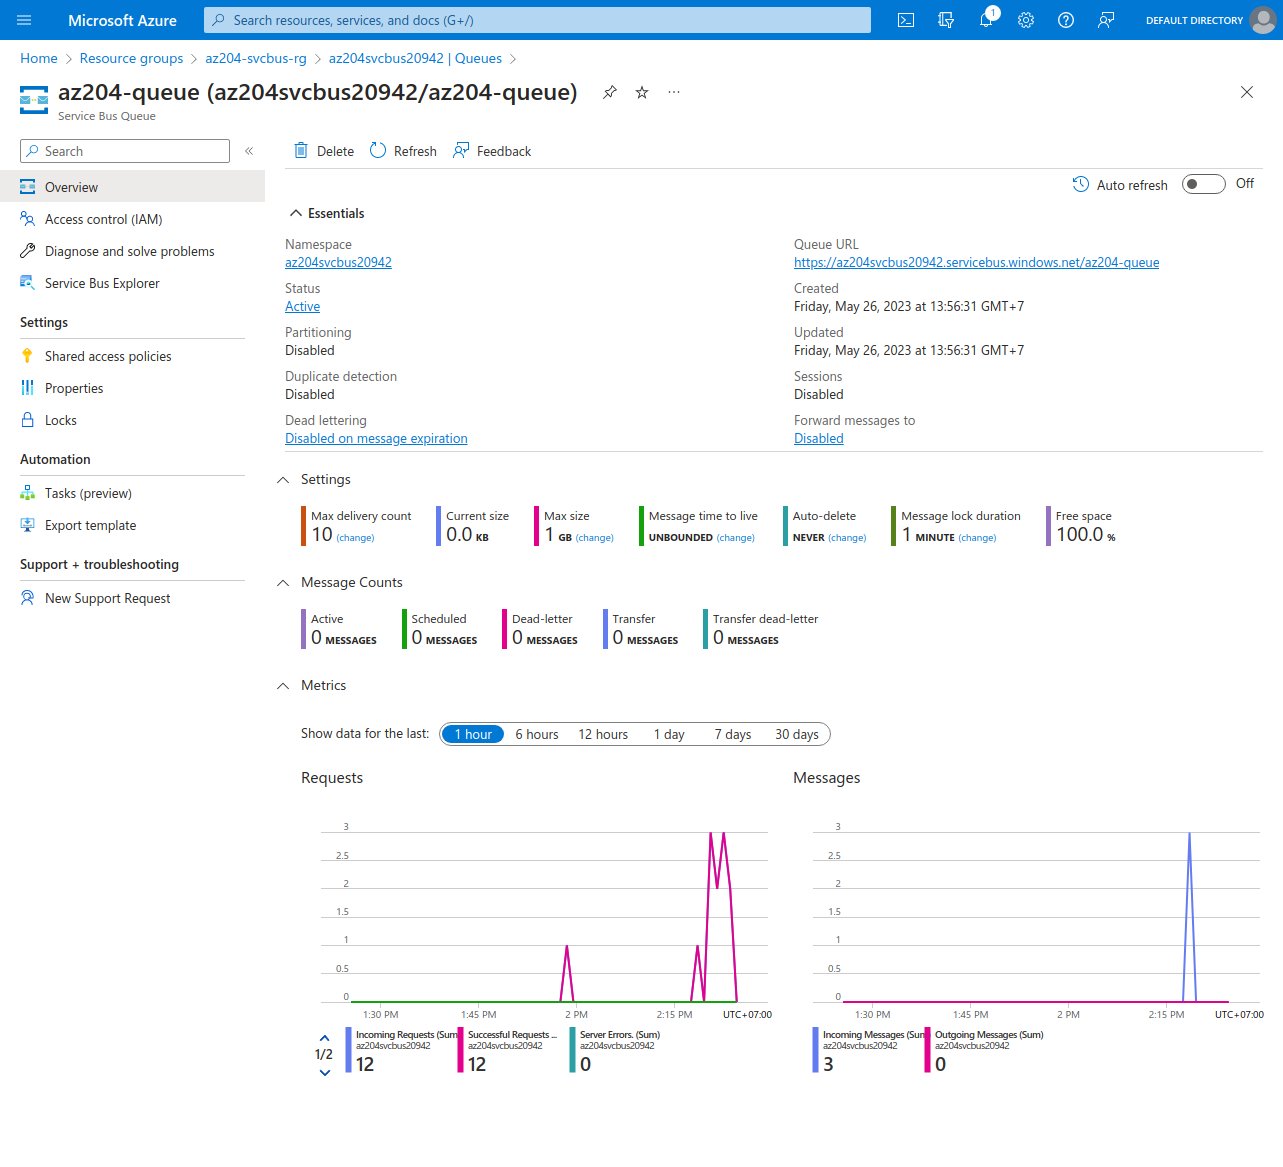
Receiving messages form the queue
Let’s do one more modification to our program by adding the following code to it, adding the functionality to receive messages from the queue. Running the dotnet build command again to verify that everything is correct, and then dotnet run we first send three new messages to the queue, and then fetch them back to our local system. If you check the queue on Azure Portal now, you can see that it’s empty, which makes sense considering that we just removed the messages from there. The message count does show up in the Metrics on the main page if you check that.
1
2
3
4
5
6
7
8
9
10
11
12
13
14
15
16
17
18
19
20
21
22
23
24
25
26
27
28
29
30
31
32
33
34
35
36
37
38
39
40
41
42
43
44
45
46
47
48
49
ServiceBusProcessor processor;
client = new ServiceBusClient(connectionString);

// create a processor that we can use to process the messages
processor = client.CreateProcessor(queueName, new ServiceBusProcessorOptions());

try
{
    // add handler to process messages
    processor.ProcessMessageAsync += MessageHandler;

    // add handler to process any errors
    processor.ProcessErrorAsync += ErrorHandler;

    // start processing
    await processor.StartProcessingAsync();

    Console.WriteLine("Wait for a minute and then press any key to end the processing");
    Console.ReadKey();

    // stop processing
    Console.WriteLine("\nStopping the receiver...");
    await processor.StopProcessingAsync();
    Console.WriteLine("Stopped receiving messages");
}
finally
{
    // Calling DisposeAsync on client types is required to ensure that network
    // resources and other unmanaged objects are properly cleaned up.
    await processor.DisposeAsync();
    await client.DisposeAsync();
}

// handle received messages
async Task MessageHandler(ProcessMessageEventArgs args)
{
    string body = args.Message.Body.ToString();
    Console.WriteLine($"Received: {body}");

    // complete the message. messages is deleted from the queue.
    await args.CompleteMessageAsync(args.Message);
}

// handle any errors when receiving messages
Task ErrorHandler(ProcessErrorEventArgs args)
{
    Console.WriteLine(args.Exception.ToString());
    return Task.CompletedTask;
}
Cleanup and conclusions
Since we put all the resources into a specific RG we can simply remove everything with the following command in order to make sure that we don’t end up with unnecessary bills for the resources.
1
az group delete --name az204-svcbus-rg --no-wait
In the end this was a rather simple yet effective exercise that helped me understand the message queue in a practical way, and while I only have rather rudimentary understanding of programming in the first place, and even less understanding of .NET, the code sample was well-documented and so straightforward that being able to read and understand it was easy.