Deploying containerized applications in the cloud has never been easier, thanks to Azure Container Instances (ACI) and Infrastructure as Code tools like Bicep. In this post, I’ll explore container instances and Bicep files, and then proceed to deploy a container instance on Azure using an uploaded main.bicep file. You’ll also learn how to verify that your container instance is up and running by accessing its IP address.
Understanding the basics
Before proceeding I think it’s good to have a simple overview on the tools we are going to be using.
Container Instances: Azure Container Instances allow you to run Docker containers without having to manage virtual machines or complex orchestration platforms. This service is ideal for scenarios that require fast startup times and simplified container management for tasks such as batch processing, microservices, or event-driven applications.
Bicep Files: Bicep is a modern language for deploying Azure resources declaratively. It simplifies the syntax needed compared to traditional JSON-based ARM templates, making it easier to author and maintain. By using Bicep, you can describe the desired state of your resources, which Azure then provisions automatically.
Exploring the .bicep file
main.bicep
This is the file we’ll be using, and while I won’t be covering it in detail if you read through it you can see that it is very clear. First we define parameters and assign values for them, for example param port int = 80 sets the parameter/variable port to an integer value of 80, and later we will assign this parameter to the port value in order to set the HTTP service to run in port 80.
1
2
3
4
5
6
7
8
9
10
11
12
13
14
15
16
17
18
19
20
21
22
23
24
25
26
27
28
29
30
31
32
33
34
35
36
37
38
39
40
41
42
43
44
45
46
47
48
49
50
51
52
53
54
55
56
57
58
59
60
61
62
63
@description('Name for the container group')
param name string = 'acilinuxpublicipcontainergroup'

@description('Location for all resources.')
param location string = resourceGroup().location

@description('Container image to deploy. Should be of the form repoName/imagename:tag for images stored in public Docker Hub, or a fully qualified URI for other registries. Images from private registries require additional registry credentials.')
param image string = 'mcr.microsoft.com/azuredocs/aci-helloworld'

@description('Port to open on the container and the public IP address.')
param port int = 80

@description('The number of CPU cores to allocate to the container.')
param cpuCores int = 1

@description('The amount of memory to allocate to the container in gigabytes.')
param memoryInGb int = 2

@description('The behavior of Azure runtime if container has stopped.')
@allowed([
  'Always'
  'Never'
  'OnFailure'
])
param restartPolicy string = 'Always'

resource containerGroup 'Microsoft.ContainerInstance/containerGroups@2021-09-01' = {
  name: name
  location: location
  properties: {
    containers: [
      {
        name: name
        properties: {
          image: image
          ports: [
            {
              port: port
              protocol: 'TCP'
            }
          ]
          resources: {
            requests: {
              cpu: cpuCores
              memoryInGB: memoryInGb
            }
          }
        }
      }
    ]
    osType: 'Linux'
    restartPolicy: restartPolicy
    ipAddress: {
      type: 'Public'
      ports: [
        {
          port: port
          protocol: 'TCP'
        }
      ]
    }
  }
}
Preparing the environment
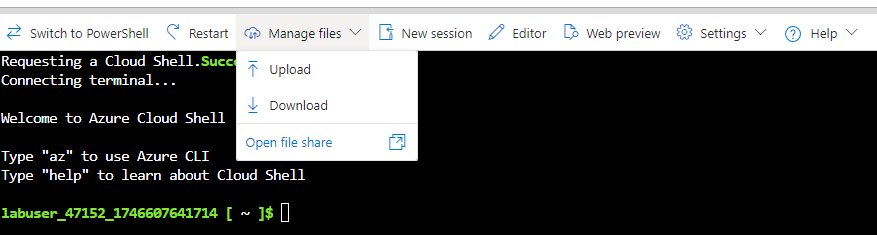
In this exercise we’ll be uploading the main.bicep file using the Azure portal and working with Cloud Shell, so we’ll first need to access Cloud Shell, selecting Bash and setting up a Resource group, Storage account and File share. These are prompted when accessing Cloud Shell for the first time, and Cloud Shell comes pre-loaded with the Azure CLI and other tools you need for managing resources.
Next we will upload the main.bicep file by clicking Manage files > Upload. You will see a message pop up in the bottom left of your screen once the upload finishes and the file is ready for use.
Deploying the Container Instance with Bicep
Now that the environment is set up and the main.bicep file is uploaded we can simply run the following command to deploy the Container Instance according to the definitions in the Bicep file:
1
2
3
4
az deployment group create \
--resource-group <ResourceGroupName> \
--template-file <PathToTemplateFile> \
--parameters name=<ContainerName>
This command instructs Azure to read the resource definitions in the file and deploy them into the specified resource group.
Verifying the deployment
Once the deployment is complete, you need to make sure your container instance is running and accessible. Since we are using Cloud Shell, we can retrieve its public IP address using the following command:
1
2
3
4
5
az container show \
--resource-group <ResourceGroupName> \
--name <ContainerInstanceName> \
--query ipAddress.ip \
--output tsv
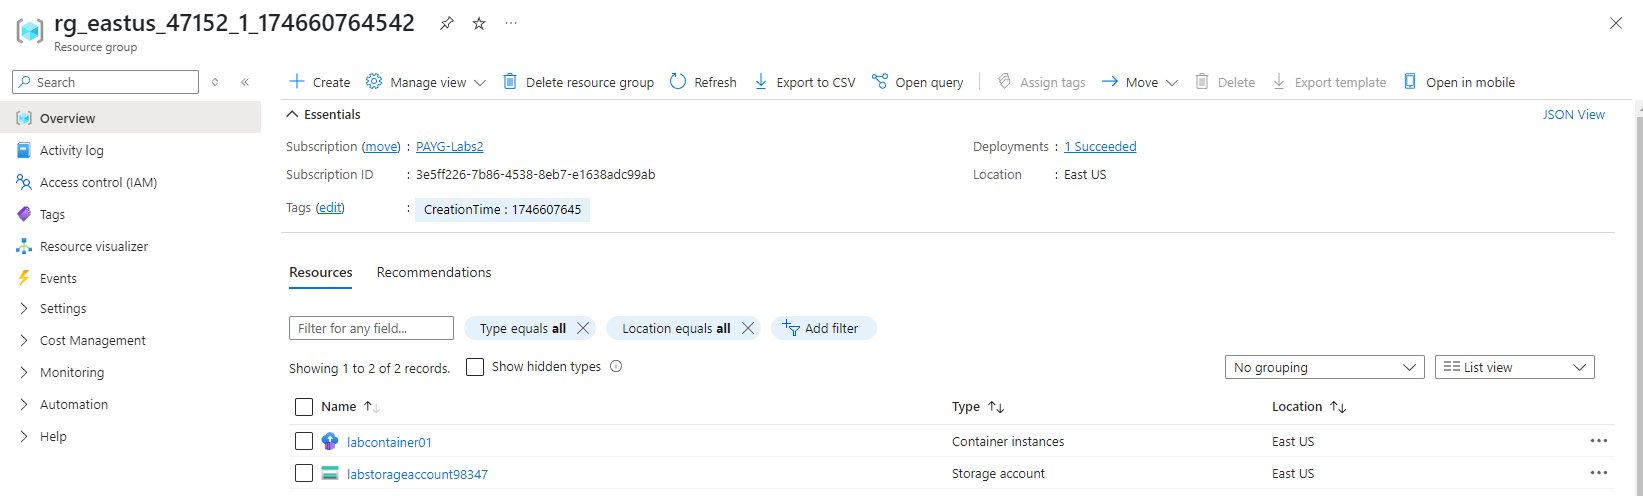
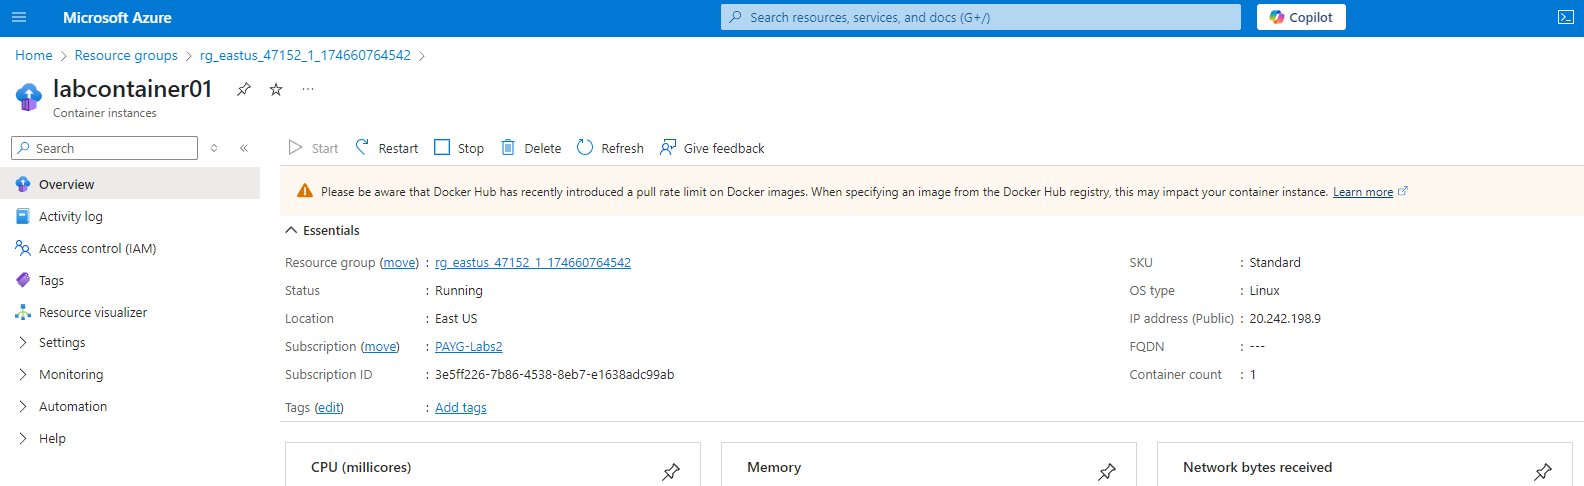
The output of this command will simply be the IP address of the container, but we can also use the portal and navigate to Home > Container Instances to find our Container Instance and see its IP address (Public) in the Overview pane.
Testing the container
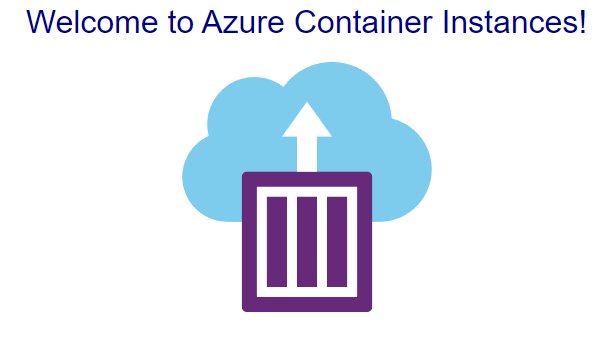
To confirm that the container instance is operational, we can use the public IP address obtained in the previous step. Open your browser and enter the IP address and you will be greeted with “Welcome to Azure Container Instances!” message with the logo of Container Instances service. Alternatively, you can test the endpoint via Cloud Shell using something like curl:
1
curl <IPAddress>
If the container is running correctly, you should see a response indicating that your containerized application is active.
Conclusion
Deploying an Azure Container Instance using Bicep not only streamlines the resource provisioning but also enhances repeatability and consistency across environments. This process is scalable and can be adjusted to include more complex scenarios such as environment variables, volume mounts, or network configurations. While individual deployments such as this are easier to manage using the Portal, being able to simplify repeated or large scale deployments using Bicep files - or any other kind of automation, really - will lead to less work, less mistakes and better consistency across the environment.